Creating and Editing Approval Groups
Creating Approval Groups
Approval Groups enable you to configure which users can approve tickets. This setup is based on selectable conditions, mainly ticket request type, along with granular filters based on Impact, Urgency, and Priority, or you can establish your own custom criteria. Approval groups can be set up for all applications or modules that support approvals, including Change, Service Request, Asset and other process modules.
Important: If you have created multiple approver groups, view Determining Approvers to learn how approval groups are applied.
To create an Approval Group:
-
In Design Studio, click All Apps, or navigate to the desired app (i.e. Change), then select the Approval Groups component. A grid displays all approval groups.
-
Click the plus-sign
 to add a new Approval Group. The Approval Group design canvas displays.
-
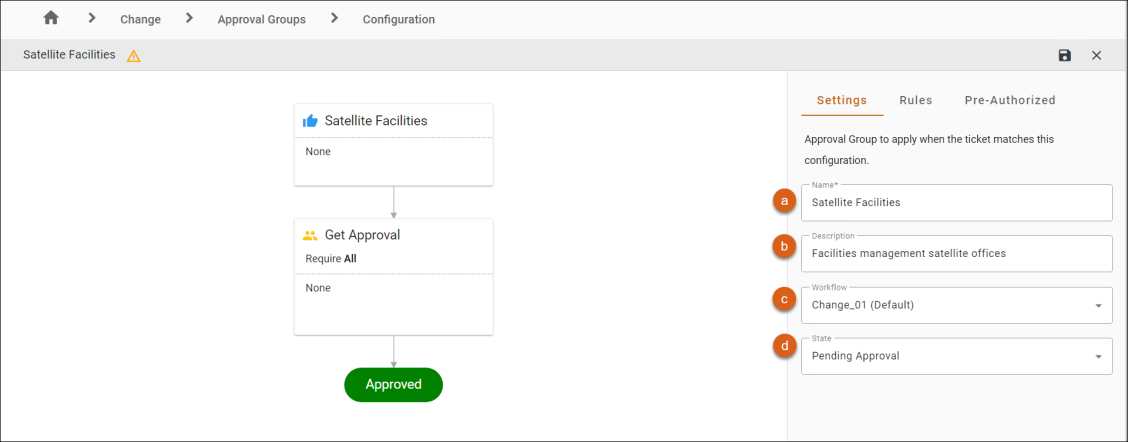
In the Properties Panel Settings tab, under Settings:
-
Enter a Name for the approval group.
-
In the Description field (optional), type a brief description of the new approval group.
-
The Workflow drop-down displays the default workflow. To change the workflow, click the drop-down to view all enabled workflows and select the workflow you wish to use.
Note: Depending on the specific data in a ticket, you can switch between multiple workflows. Each of the workflows can have its own unique set of approval groups, ensuring that the appropriate group is handling approvals for the relevant workflow.
-
The State drop-down includes Pending Approval by default. If you have multiple approval stages in a workflow, select the state that relates to that approval group state.
-
-
Under the Rules tab, select the criteria applied for a ticket to determine when to use an approval group in the Require Approval drop-down.
-
If you select for specific changes, click the
 button and select a change ticket type, then click Add. The new ticket type displays. You can click the drill-down arrow next to the change ticket type to expand to reveal its sub-types. You can select multiple types. To remove a type, select the row for the change type, click the Trash
 icon and confirm that you wish to delete the record. Default approval groups exist for each application or module and includes All types. This is read-only and cannot be edited.
Note: Sub-types also uses this group unless you define a specific group for the sub-types, i.e., if you choose Facilities, the sub-types of Power connection, Lighting, and UPS automatically use the same approval group as Facilities. However, if you choose Power connection, only tickets with the ticket Type set as Power connection apply the approval group.
-
If you select for matching criteria, enter the specific criteria used in determining which tickets require the group's approval. See Using the Criteria Builder for more information.
-
Click
 to Save.
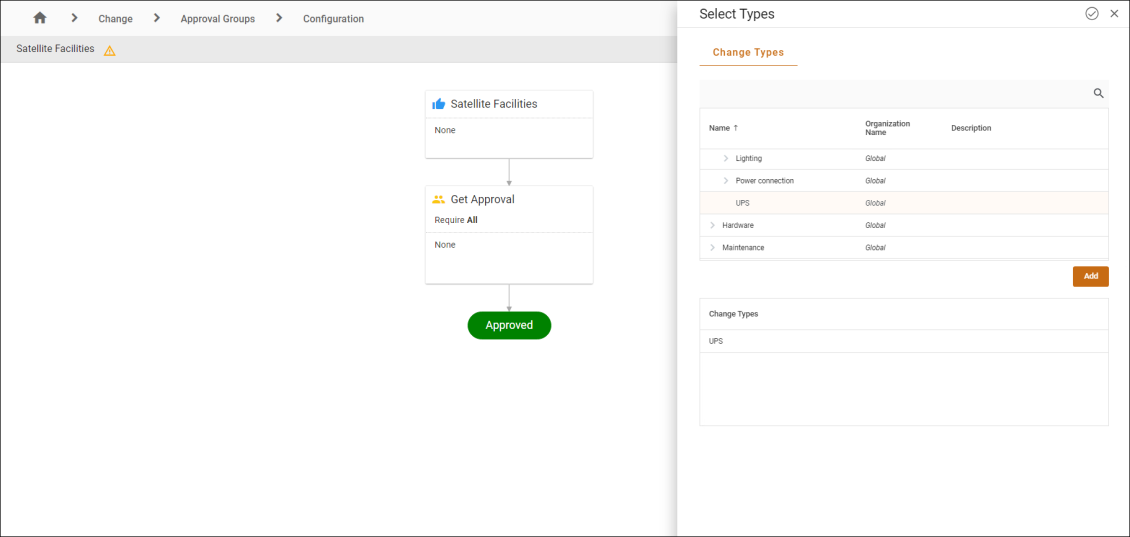
-
-
Under Pre-Authorized, click the
to select recipients who can bypass the approval process. See the Pre-authorized Users section below for more details.-
Select a user, team, or role and click the Add button.
-
Click
to Save.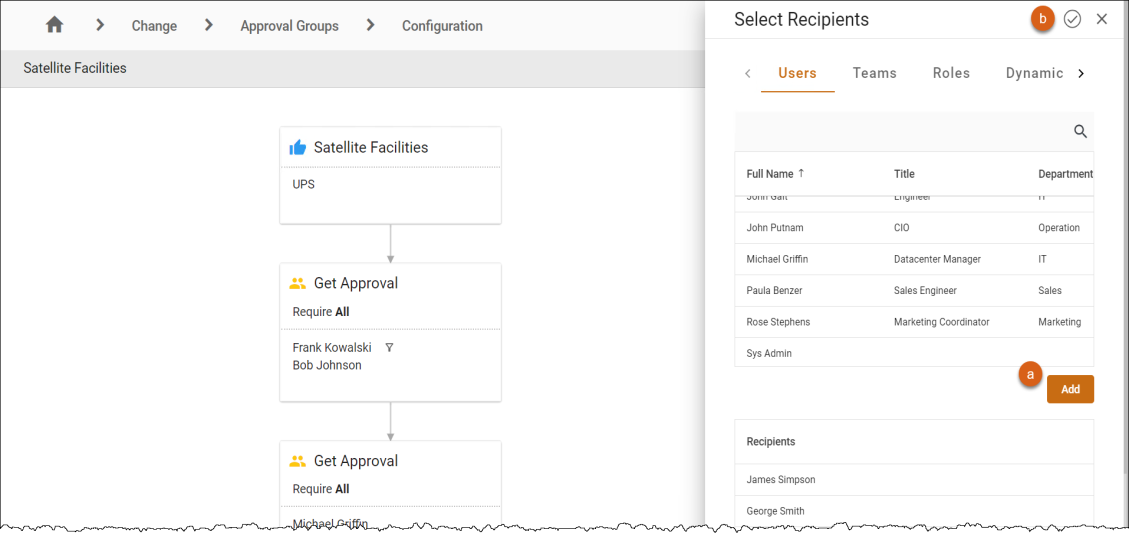
-
-
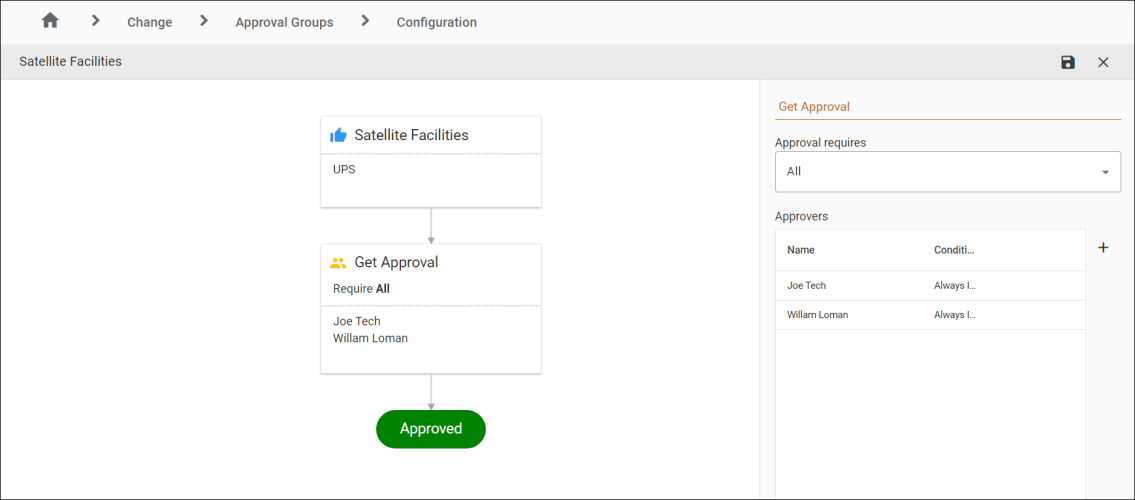
To add approvers, click the
 under the default card to create a Get Approval card, then click within the Get Approval card to display its properties.
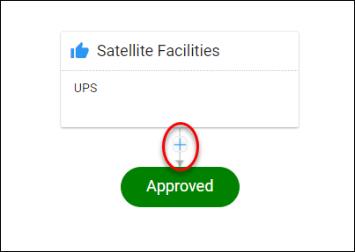
-
In the drop-down under Approval Requires: select whether the Approval Group will require one or all approvers to approve.
-
Under Approvers:
-
Click the
 to add approvers.
 -
From the Users, Teams, Roles, and Dynamic Roles tabs, select recipients you want to add to the Approval Group.
Note: Approval Groups allow you to easily select your approvers, arrange them in a sequence, group them by certain criteria, and set conditions for their approvals. See the Approval Group Options topic for more information.
-
-
Click Save
 .
.
Pre-authorized Users
The Pre-Authorized section lets you define a list of users whose change requests do not need to be approved by an approver. Pre-authorization creates a fast-track for trusted users to automatically move their change requests into the next phase of the change request life cycle. As such, pre-authorization takes precedence over the list of approvers.
Important: Pre-authorization is determined by the user who moved the ticket into the Approval state, not necessarily the user who submitted the ticket.
When a pre-authorized user moves a ticket into the Approval state, the ticket is automatically approved and moves into the next state. ChangeGear also updates the ticket history to reflect that the ticket was approved by a pre-authorized user.
Editing Approval Groups
ChangeGear comes with a default Approval Group that you can edit to further streamline your organization’s ticket management workflows.
Note: This feature is supported by the Change Management, Service Request Management, and Flex modules.
To edit an Approval Group:
-
In Design Studio, click All Apps, or navigate to the desired app (i.e. Change), then select the Approval Groups component.
-
Double-click the Approval Group you wish to edit, or click the pencil icon. Use the Search
 icon to search and filter. The Approval Group design canvas displays.
 -
Select the Approval Card you wish to edit to view the Properties Panel for the card.
-
Enter your changes (for more information, see Creating Approval Groups).
-
Click Save.